Yampi is a Brazilian payment solution and e-commerce platform that helps businesses create online storefronts, handle sales, and accept payments with ease. It has a user-friendly design and many functionality, including as tools for managing inventory, orders, and customer interactions and interfaces with various payment systems.
Businesses may automate client contact at critical touchpoints by combining Yampi with Interakt. In order to increase consumer engagement and sales, they may send notifications anytime an order is made, offer information on order statuses (such as shipped, out for delivery, and delivered), and even get in touch to recover abandoned carts.
Steps for Integrating Yampi with Interakt Account
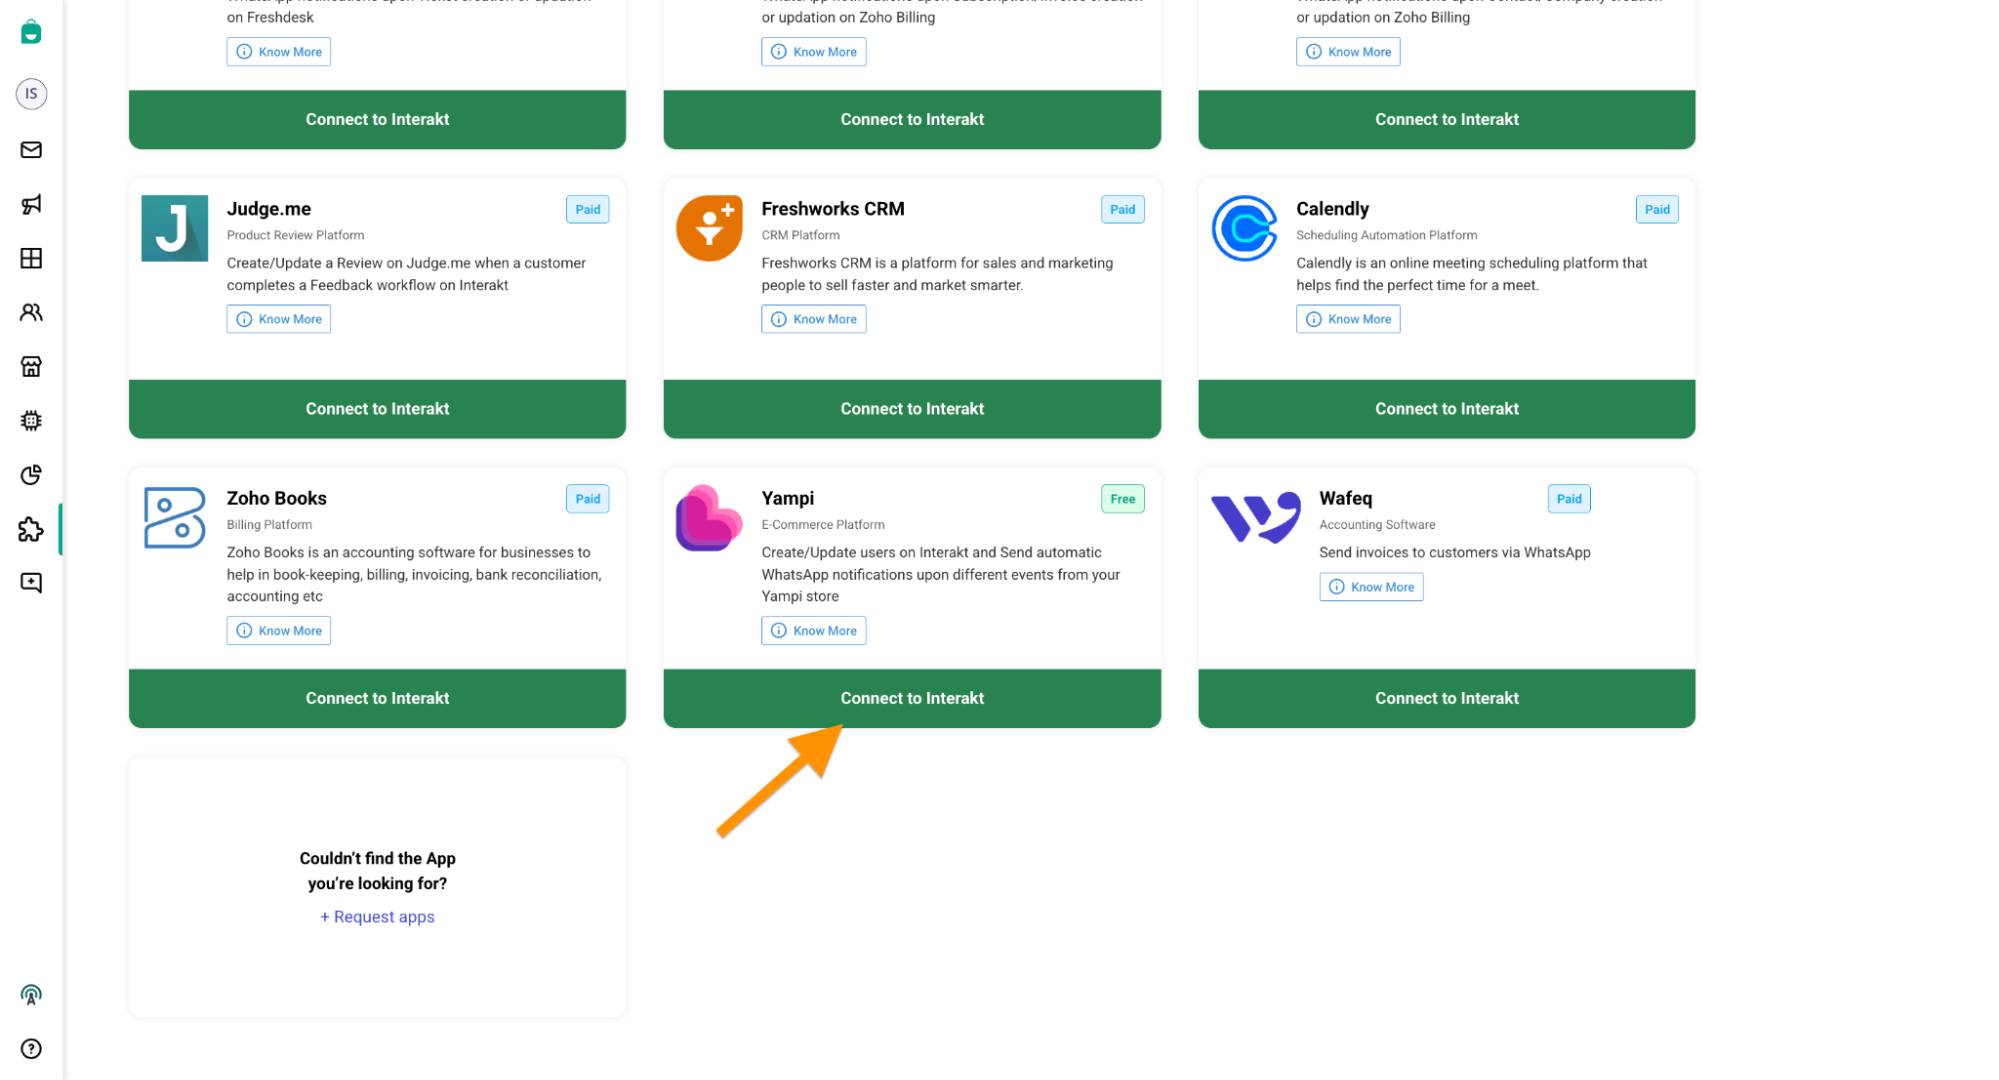
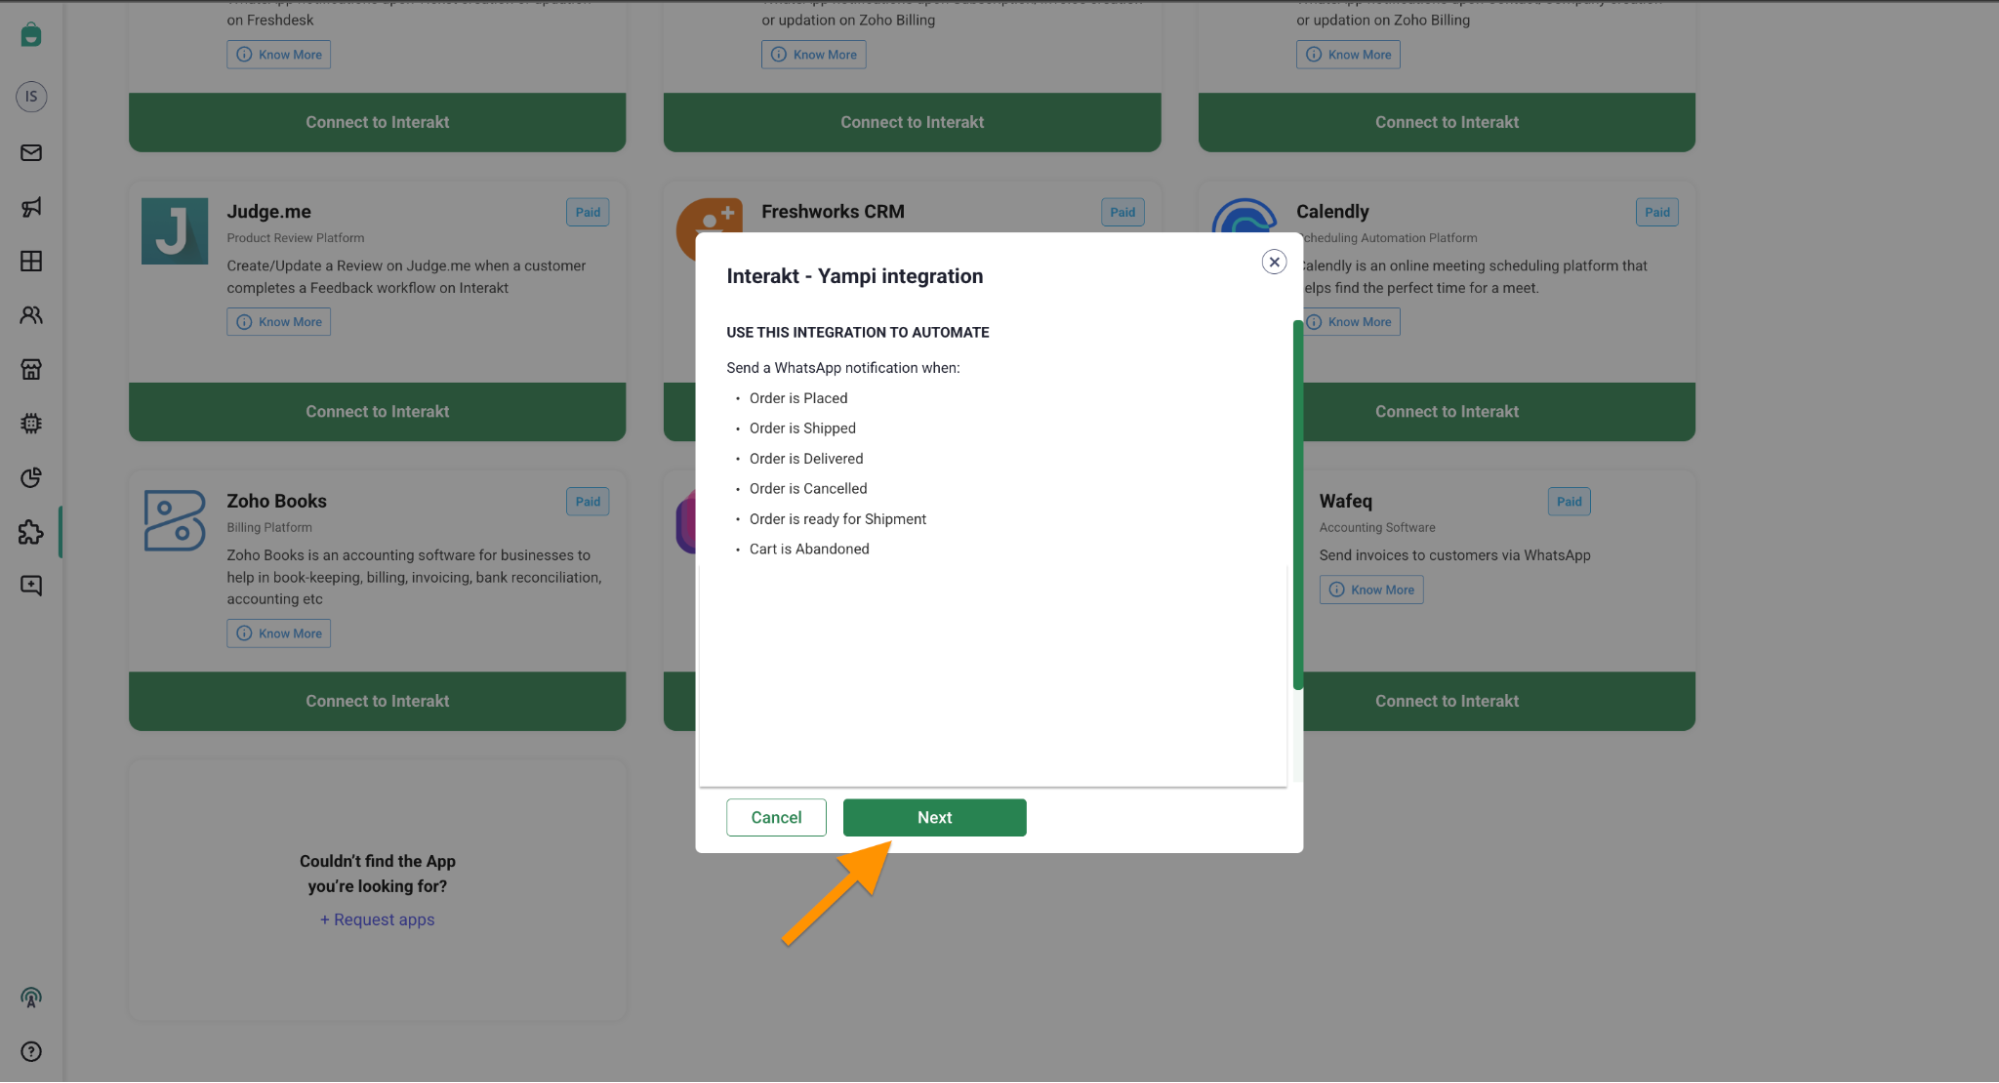
1. Navigate to the integration section of your Interakt account. Locate the Yampi app card and click on “Connect to Interakt.”
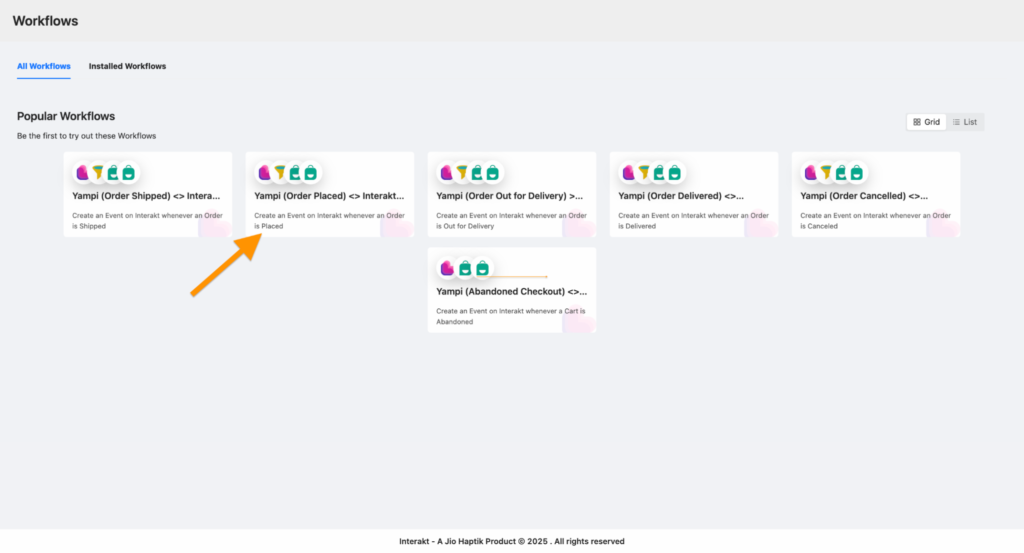
2. Click on “Set up” to get redirected to the Workflow page
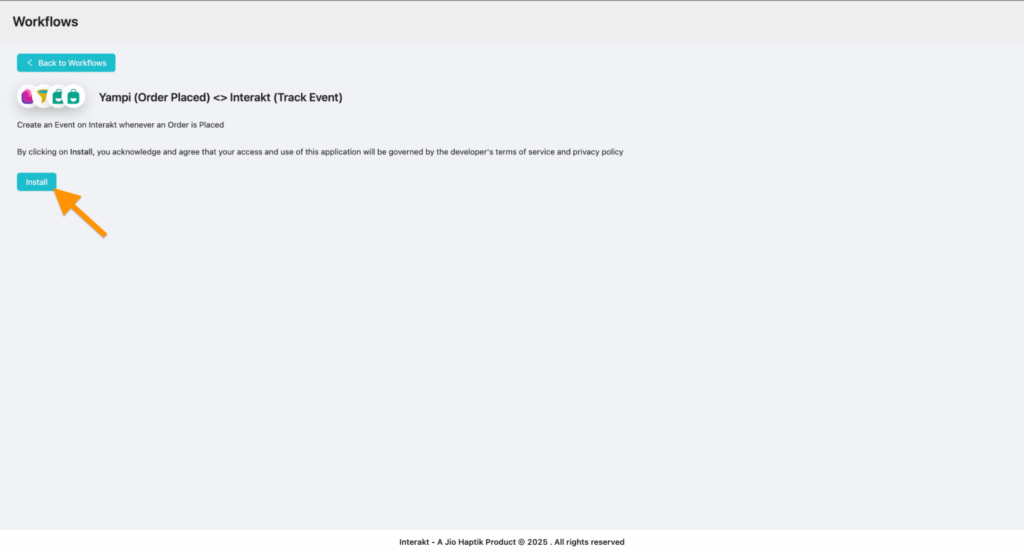
3. Select the Workflow Template and Install the same
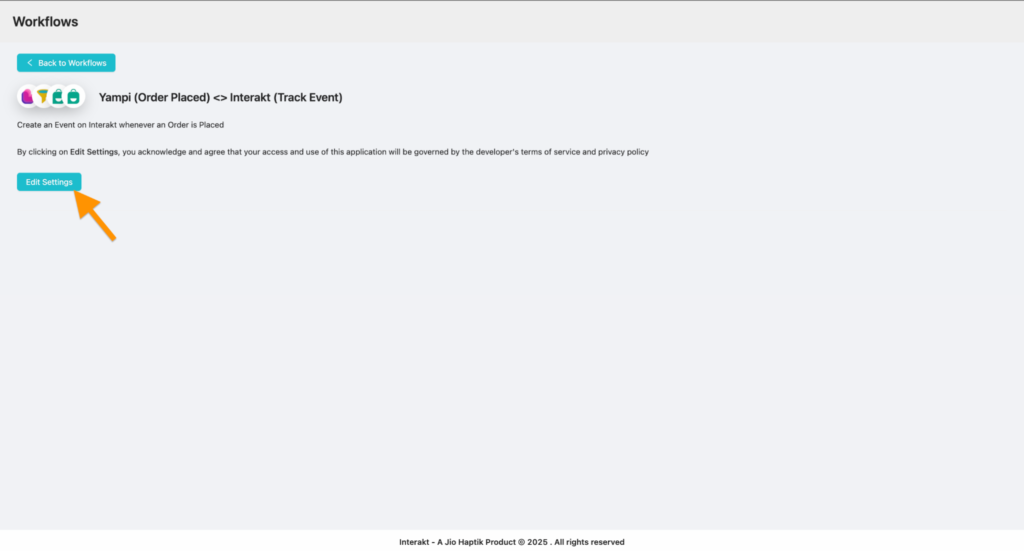
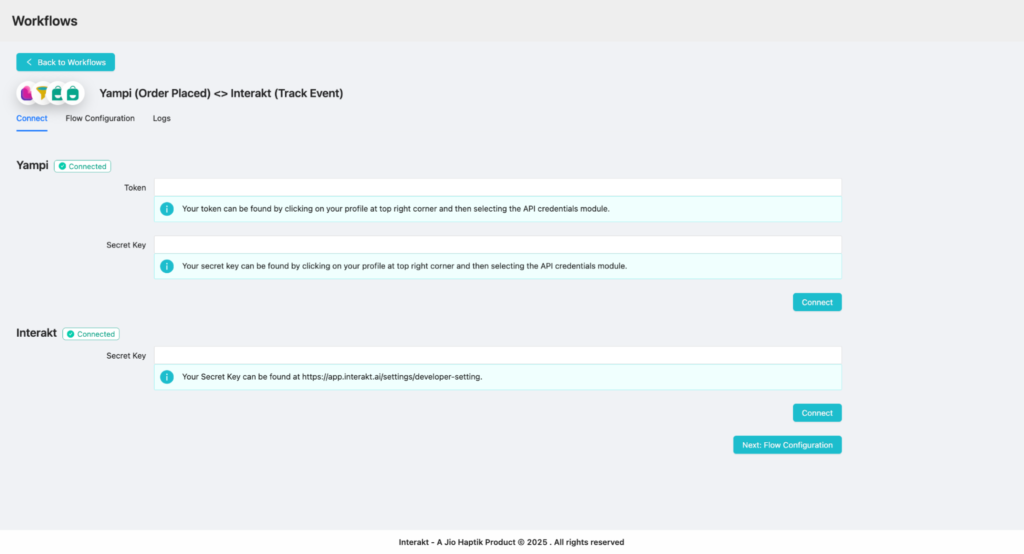
4. Once Workflow is installed, click on “Edit Settings” and authenticate both the apps (Yampi and Interakt)
How to fetch API keys for Yampi Integration?
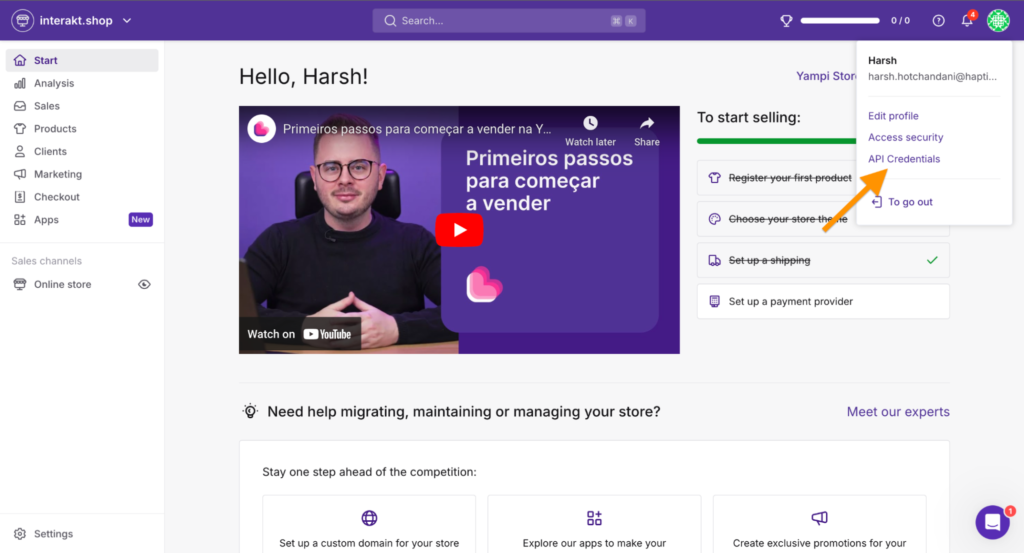
– Yampi: Your API key can be found by clicking on the Profile section on the top-right and then selecting the “API Credentials” module.
– Interakt: Your Secret Key can be found here
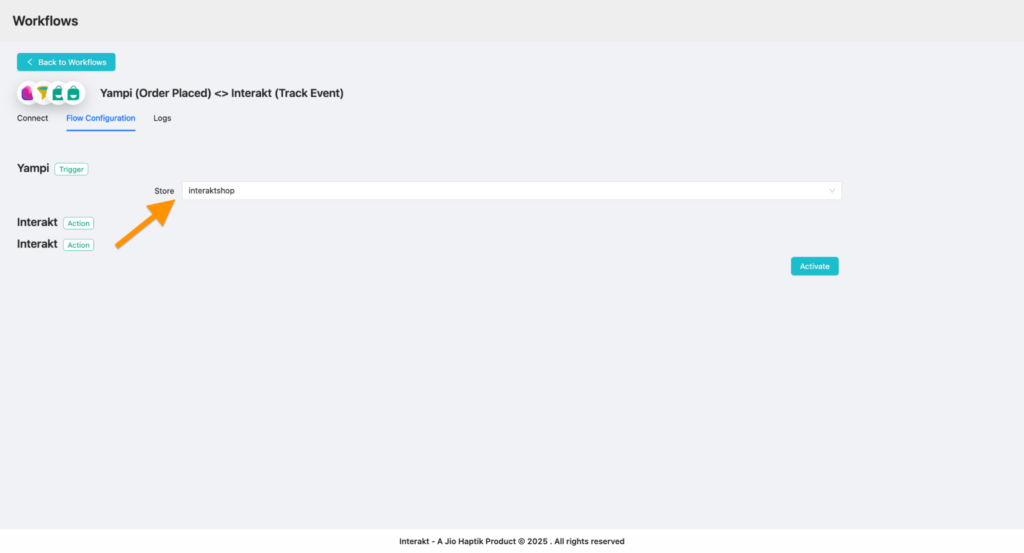
5. Once the accounts are authenticated and connected, click on Flow Configuration and Map the required fields as shown in the screenshot below
Select the desired Store from the dropdown that are part of your Yampi account
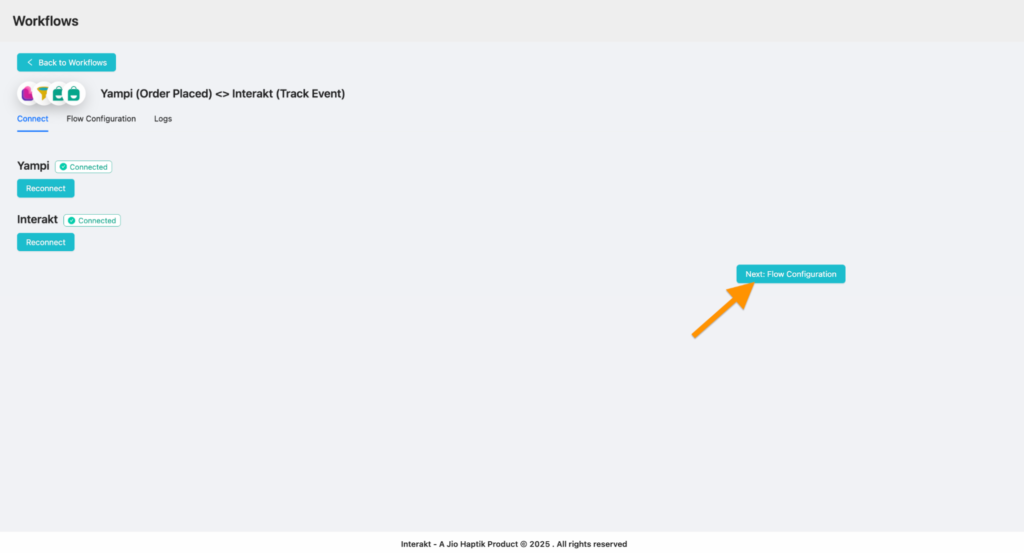
6. Once the Flow is Configured, hit “Activate” to get the Workflow Live.
Template Creation
Before you test out the workflow, first let’s create an “Order Placed” Template on Interakt as per the above use-case.
1. Go to the Template section and click on “Create New” from top-right corner

2. Enter the Template Name, Category and Language along with Button type (if any)
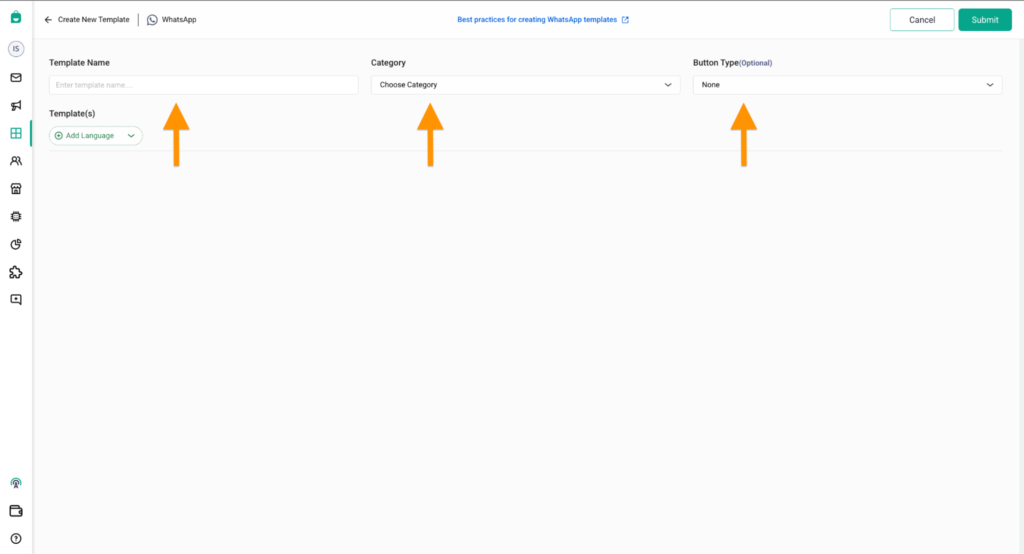
3. Enter your desired content for the Template and hit Submit
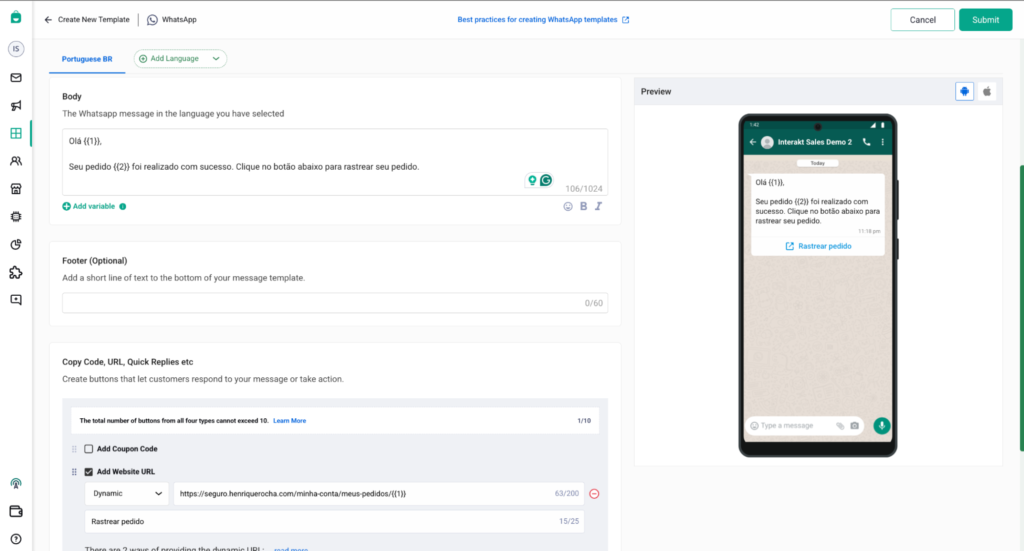
Note: In case you would like to send the Order Tracking URL to the customer, ensure that you structure the Button Type as “Website URL” > Dynamic > Enter the below details
– Base URL of your store
Example: https://seguro.henriquerocha.com
– Append the path below and add a variable to send dynamic Order URLs
/minha-conta/meus-pedidos/{{1}}
Your template should get approved within a few minutes.
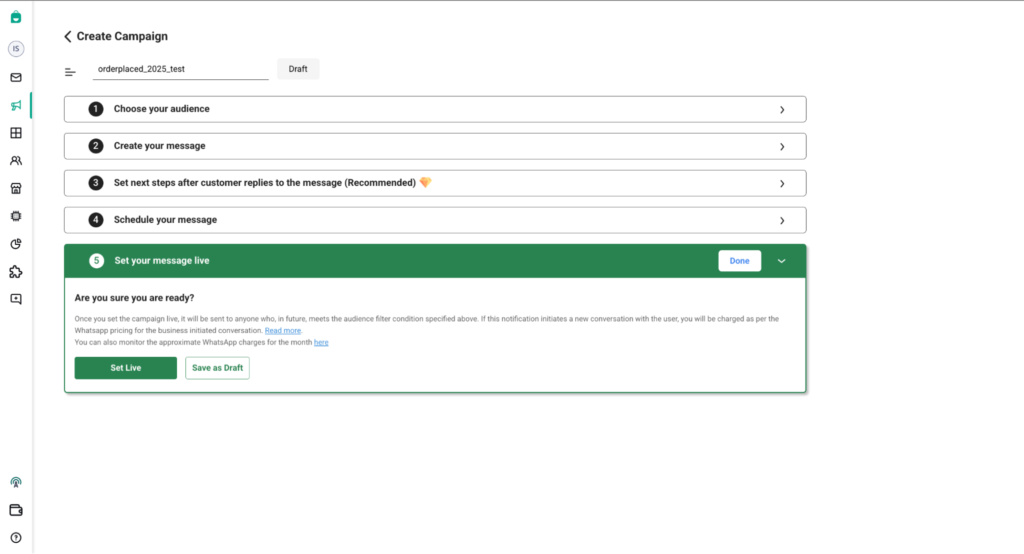
Campaign Creation
Now, that your Template is approved, next step is to create your automated ongoing campaign which triggers whenever an Order is Placed successfully (payment approved) by the end customer.
Steps to Create the “Order Placed” Ongoing campaign
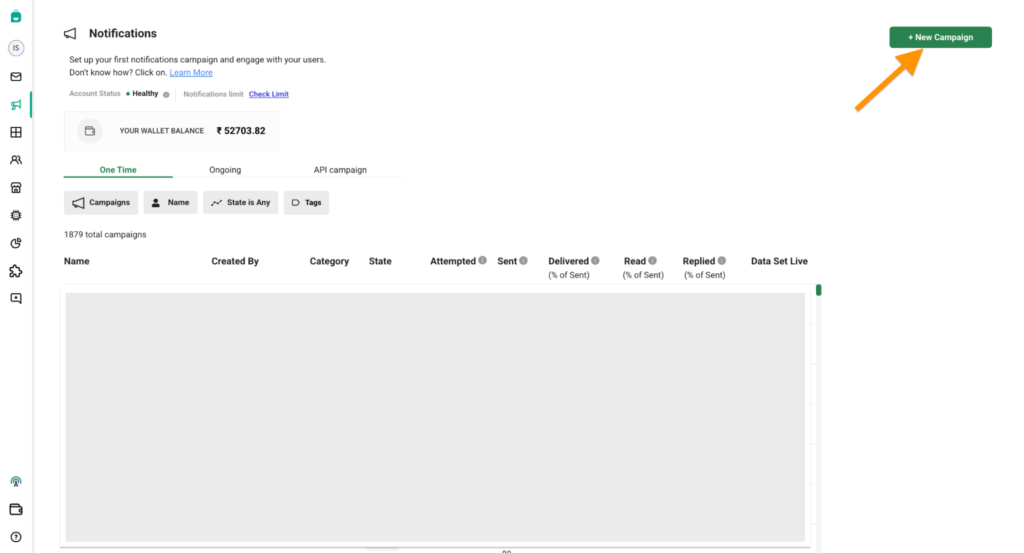
1. Go to the “Notifications” section from left pane and then click on “New Campaign” from the top-right corner
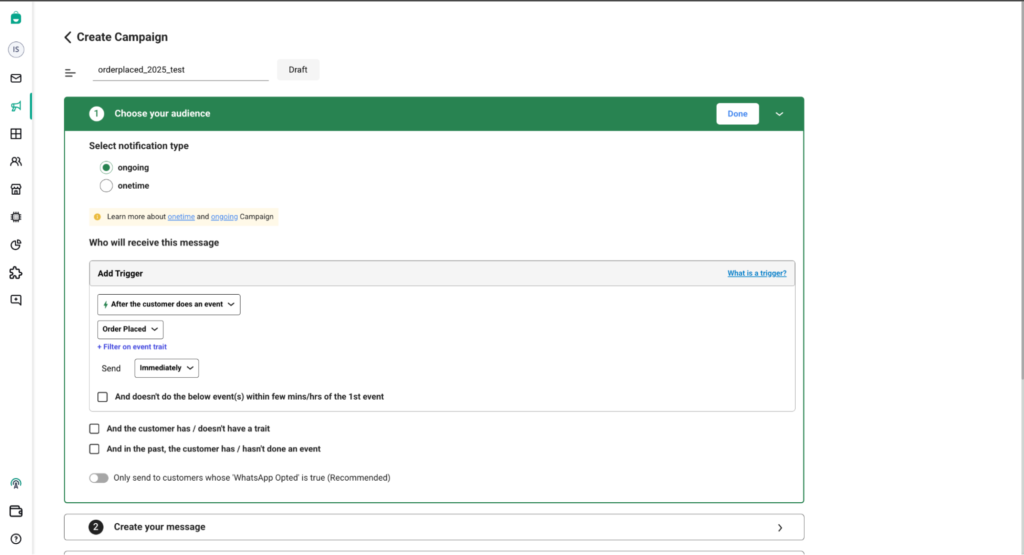
2. Give your Campaign a Name and proceed ahead. Under “Choose your audience” step, select Notifcation type as “Ongoing” > Trigger as “After the customer does an Event” > Order Placed
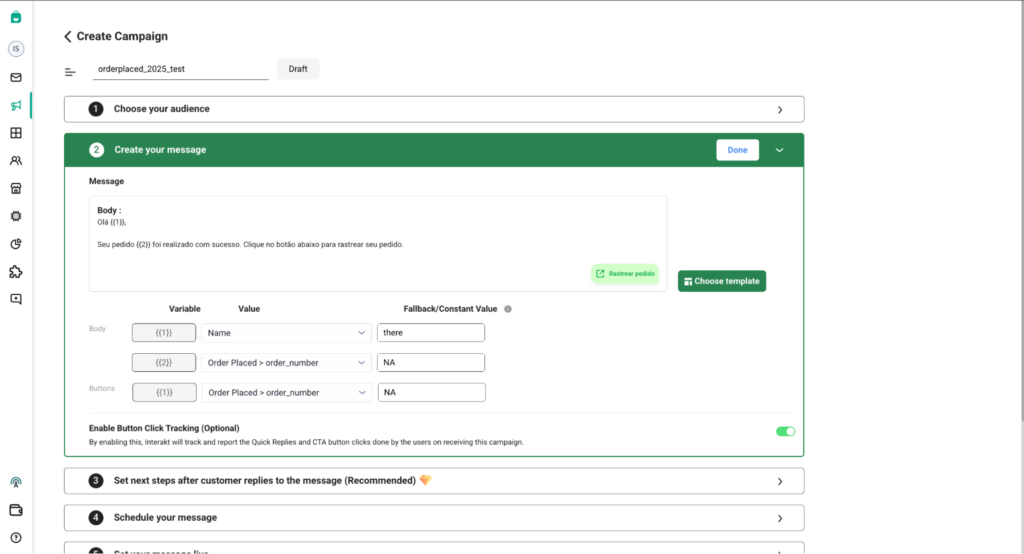
3. Under “Create your message” section, click on “Choose Template” and select your desired template.
Basis on the variables in your chosen template, map the fields according to the Event Name
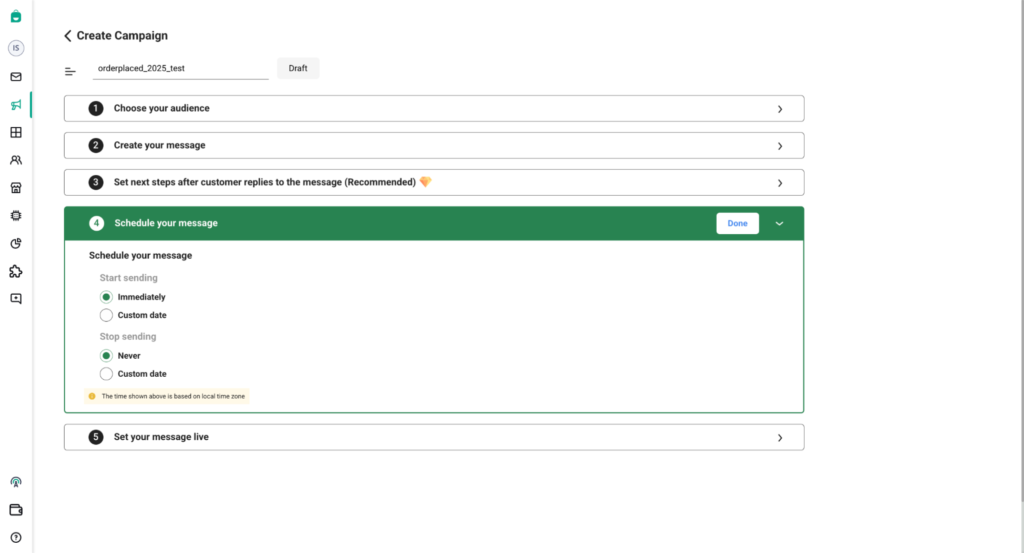
4. Schedule your message as per your desire.
Note: To keep the Campaign running, select “Never” as the option under “Stop sending” section
5. Once you have created your campaign, simply hit the “Set Live” button to create and activate the campaign
Now that your campaign has been successfully created, it’s time to test the integration.
To test it, place an order on your Yampi store and wait for the event to reflect in your Interakt account.
Here’s how to verify the event:
1.Go to the “Users” section on Interakt and search for the customer.
2. Click on the customer profile and navigate to the “Events” section in the right pane.
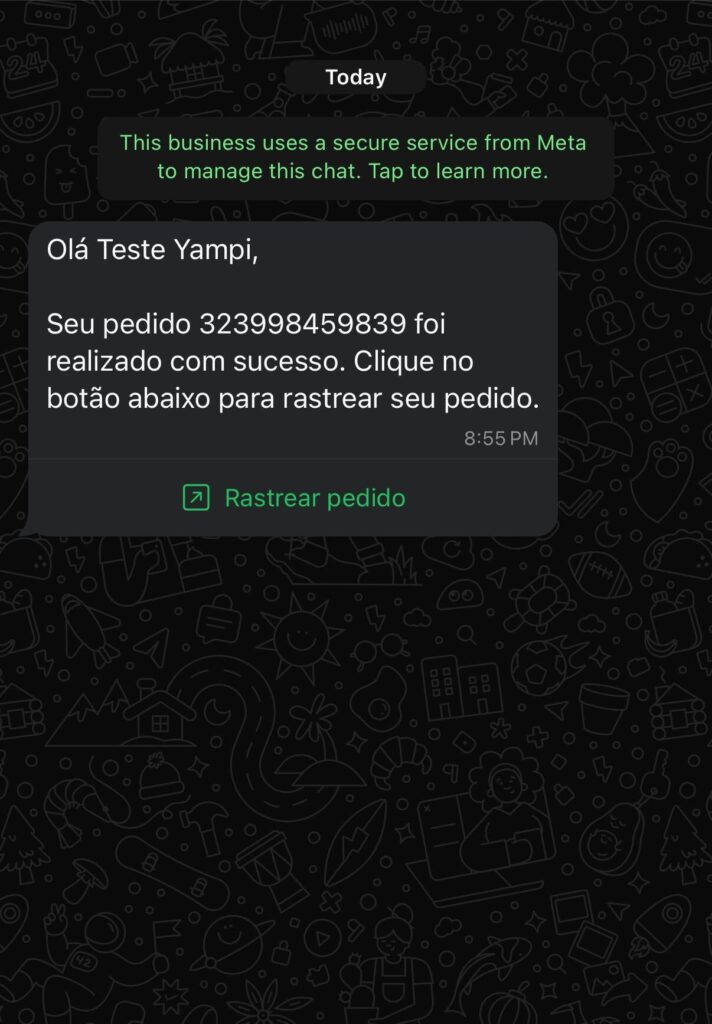
You should see the “Order Placed” event associated with the respective customer.
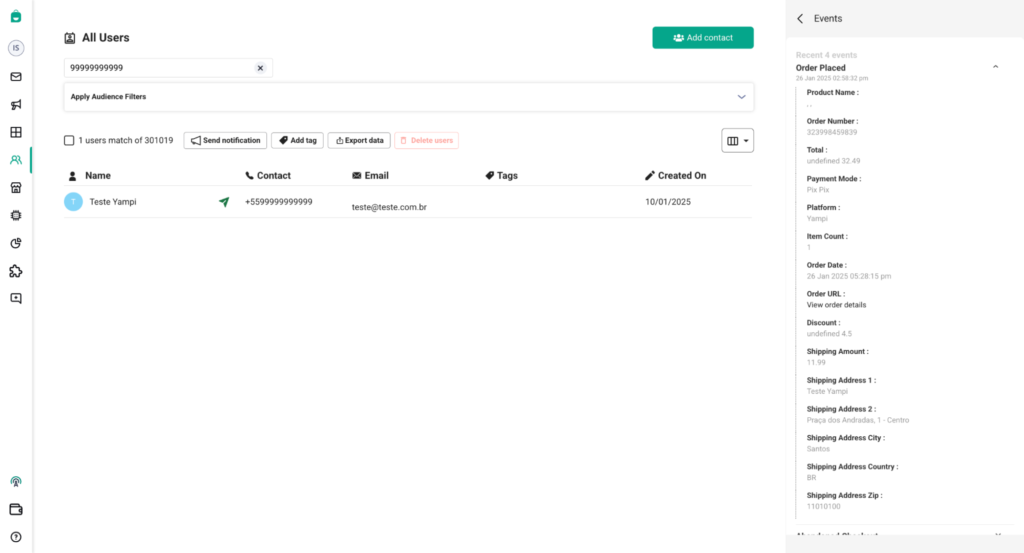
The end customer will also receive an automated message confirming that their order has been successfully placed. This message ensures that the customer is promptly informed about their order status, enhancing their overall shopping experience. It provides key details such as the order number, items purchased, and any additional information configured in the message template.