How to Search, Filter, and Perform Actions in Contact Hub
April 8, 2025
Marketing & Support, Sales CRM
Introduction
Managing a large list of contacts can be overwhelming. To help businesses work more efficiently, Interakt’s Contact Hub page now allows you to search, filter, and perform actions with ease.
This guide will walk you through how to:
1.Select multiple contacts and perform bulk actions
2.Search for contacts quickly
3.Sort contacts based on creation or closure dates
4.Filter contacts using different criteria
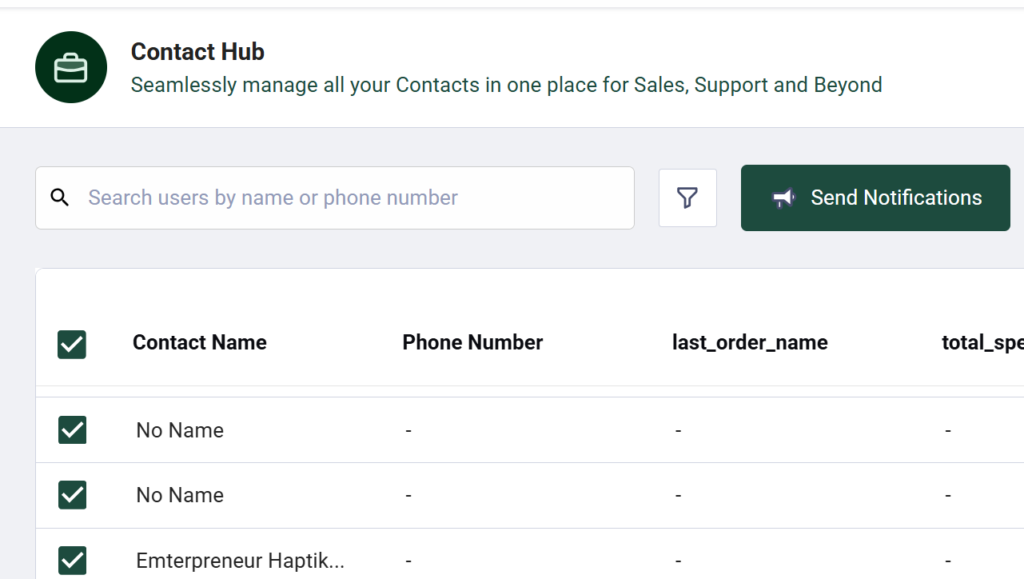
Selecting Bulk Contacts and Performing Actions
You can now select multiple contacts immediately and perform certain actions.
How to Select Contacts
1.Use the checkbox next to each contact’s name to select it.
2.To select all contacts on a page, click the checkbox in the header row.
3,If you switch pages and select more contacts, they will be added to your total selection.
4.The total number of selected contacts is displayed at the bottom (e.g., “8 out of 1234 contacts selected”).
5.Once you select contacts, the Send Notifications button and options in the More Actions dropdown will become available.
Tip: If you want to unselect all contacts, simply uncheck the header checkbox.
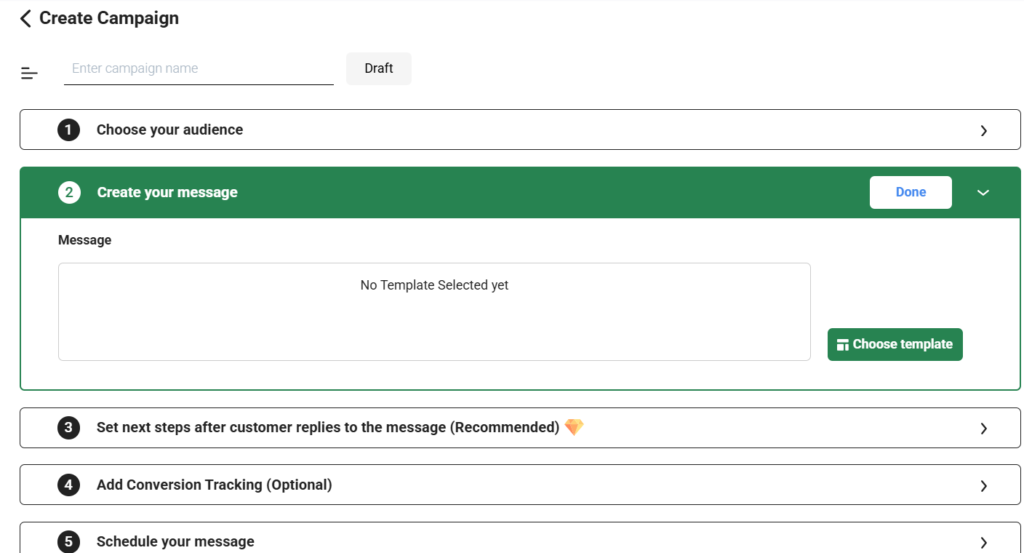
Send Notifications
Once you have selected a contact, you can choose to send a notification from the Contact Hub page.
1.Select contact(s)
2.Click on the Send Notifications button
3.You will land on the Create Campaign page
4.Follow all the steps, and you are ready to send a notification campaign
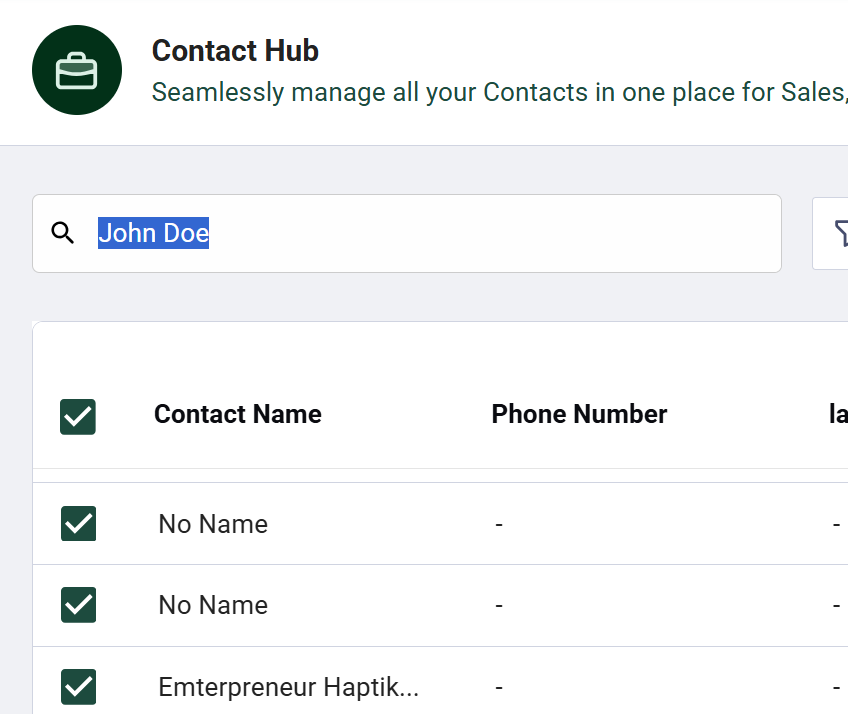
Searching for Contacts
You can now search for any contact quickly using the search bar.
How to Search:
1.Enter the contact’s name, email, phone number, lead source, or any other available parameter.
2.The search will filter results in real-time.
3.No changes have been made to how search works—it remains fast and efficient.
Example:
Searching for “John Doe” will instantly show all contacts with that name.
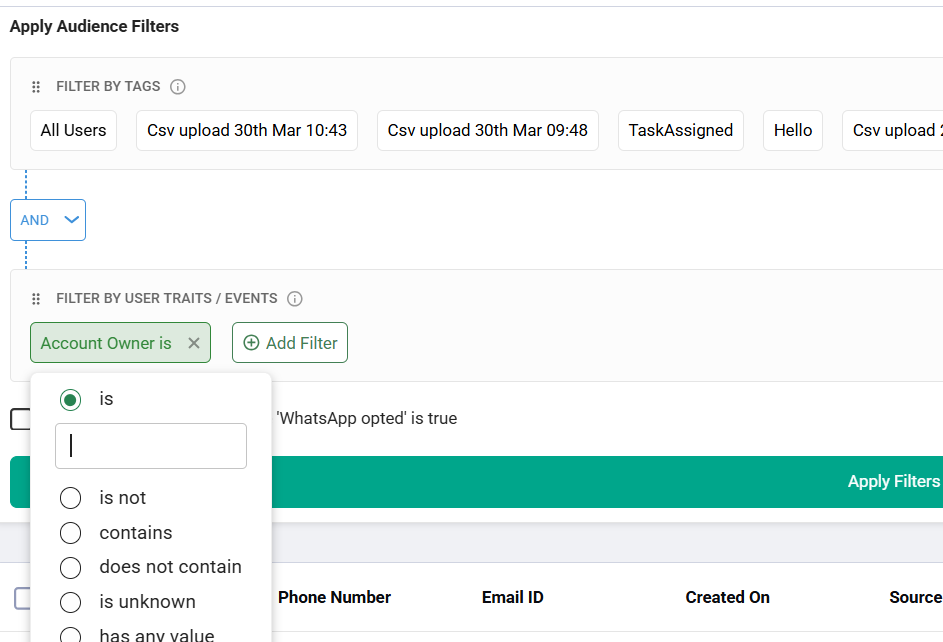
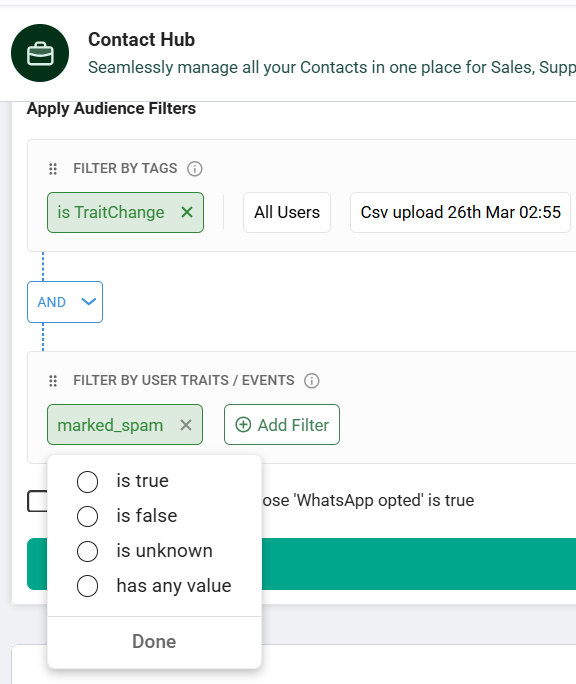
Filter Contacts
1.Click on the filter icon at the top
2.Here you can filter your contacts based on two parameters – Tags or Traits/Events
Example:
If you want to see only contacts assigned to you, apply the Account Owner = Your Name filter.
Tip: Use multiple filters at once to refine your search and find exactly what you need.
Note – Super Admins can access all leads across teams, while those who have been assigned the role of Team Lead can view only their team’s leads.
Sorting Contacts
Sorting helps you organize contacts based on when they were created or when they were closed.
How to Sort:
1.Click on the Sort button.
2.Choose one of the following options:
– Ascending – Creation Date (Oldest contacts first)
– Descending – Creation Date (Newest contacts first)
– Ascending – Closure Date (Oldest closed contacts first) (New Field)
– Descending – Closure Date (Newest closed contacts first) (New Field)
Example:
🔹 If you want to see the most recently created contacts first, select Descending – Creation Date.
Tip: Sorting helps you prioritize recent leads or revisit older ones.
Conclusion
With these improvements, managing your contacts in Interakt is now faster and more efficient. You can search, filter, and take actions seamlessly, making it easier to handle sales, marketing, and customer support workflows.