
If you’ve got more than one person handling leads or customers in Interakt, it’s important to control who sees what.
That’s where Teams comes in.
With Teams, you can organize your agents (employees or staff) into groups and control what contacts they can see and manage. For example, your Delhi Sales Team won’t see what the Mumbai Team is working on — unless you want them to.
Let’s walk you through how it works
What is a Team in Interakt?
A Team is a group of agents in your Interakt account. Each team has:
-A name (e.g., “North Zone Sales”)
-One or more Leads (like managers or senior sales staff)
-Other Members (regular team agents)
Why Create Teams?
Here’s why you’d want to set up Teams:
– Keep your sales teams focused on only their leads
– Let team leads view the contacts handled by their team
– Avoid clutter and confusion for agents
– Better contact ownership and privacy
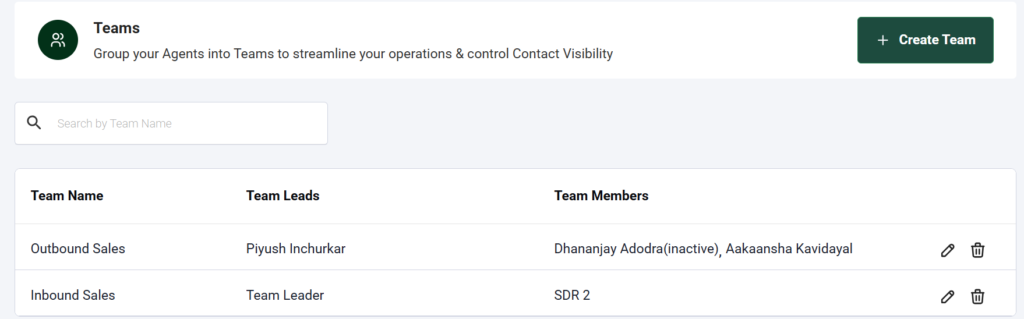
Viewing All Teams
To see your current list of Teams:
1.Log in to Interakt.
2.Go to Settings > Manage Teams.
You’ll see a list like this:

With Action items like –
Edit: Update the team name, members, or leads
Delete: Remove a team (you’ll get a warning popup before this happens)
Note: Deleting a team will remove team-based visibility. All agents from that team will lose access to team-specific contacts.
Creating a New Team
Here’s how to create a team step-by-step:
-Click the Create Team button on the top right.
-A side panel will slide open with the title Create a Team.
Step 1: Add a Team Name
Example: East Zone Sales or Customer Support, Gurugram
Step 2: Select Team Members
-Use the dropdown to search and select your agents.
-Each agent will appear with:
-Name
-Email
-Phone number
-Their roles (like Member or Lead)
You can select multiple agents at once!
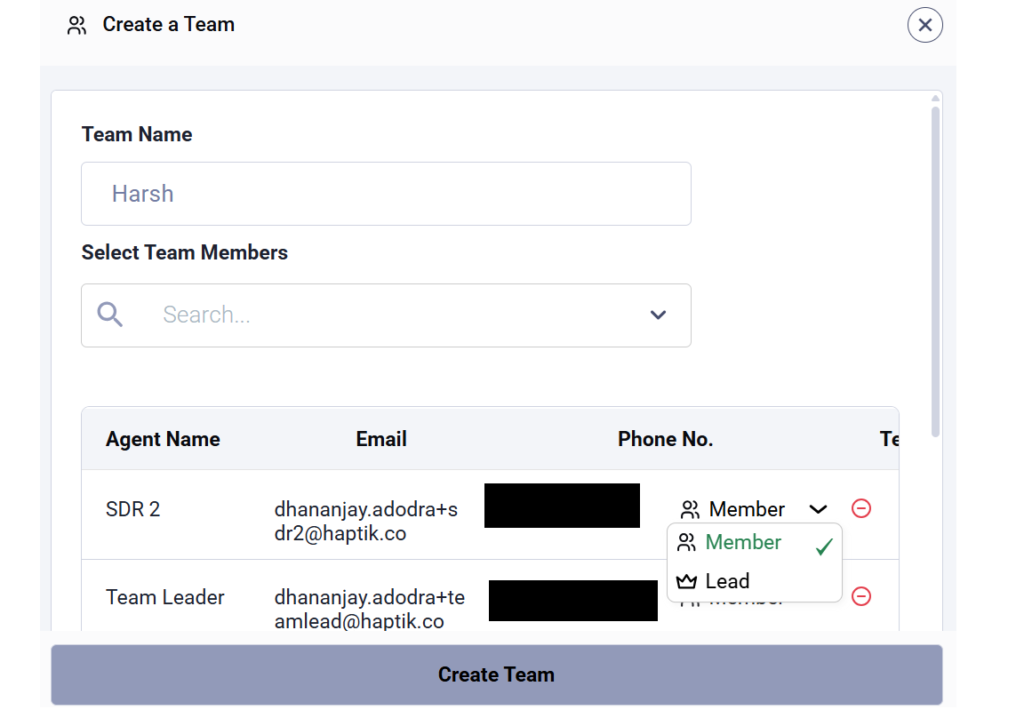
Step 3: Set the Hierarchy (Lead vs Member)
Once selected, the agents show up in a table below. Here you decide who’s a Lead and who’s a Member.
You can have multiple Leads in a team. But you must have at least one Lead before saving the team.
Final Checklist Before Saving
-Team Name is filled in
-At least 1 agent is added
-At least 1 agent is marked as Lead
Once done, click Save and your team is ready!
How Contact Visibility Works in Teams
This part is really helpful when your business grows.
Let’s say:
-Rahul is a Lead in Mumbai Sales
-Karan and Sneha are Members in that team
Here’s who can see what:

This ensures team leads have better visibility, and regular agents stay focused only on their assigned leads.
Example Use Case
Imagine you run a real estate agency across 3 cities.
You want to make sure:
-The Mumbai team doesn’t see what the Delhi team is doing
-Delhi leads can oversee her team’s progress
-Each sales agent only sees their own prospects
So, you:
-Create 3 Teams — Mumbai, Delhi, and Bengaluru
-Assign one lead per city
-Add team members accordingly
Now, your sales ops are clean, focused, and privacy-friendly!
Some important points to remember -
-Teams help you organize agents and control contact access
-Every team must have a name, at least one agent, and at least one Lead
-Leads see their team’s contacts; Members see only their own
-You can edit or delete teams anytime
-Use teams to reduce clutter and improve performance


