Applying for WhatsApp Business API can transform how you engage with customers. This article offers a clear, step-by-step guide to help you apply and set up the WhatsApp Business API with Interakt. Follow these steps to start leveraging WhatsApp’s powerful messaging tools for your business.
The complete setup to get WhatsApp Business API is simplified in 3 easy steps:
Step 1: Link your Facebook Business page with Interakt
After you have successfully signed up with Interakt’s login, you need to link your Facebook Business account as the first step in setting up of your WhatsApp Business API.
First of all, make sure that you have these things in place:
• Your company’s legal business name, address and the display name that you want to use for your WhatsApp Business number.
• Secondly, ensure that you have the phone number that you want to use for WhatsApp Business API ready with you, before initiating the process. This number should be able to receive an OTP and please note the number that you provide for WhatsApp Business API cannot then be used by any other products of WhatsApp such as the WhatsApp standard account or a WhatsApp Business App. This would remain a WhatsApp Business API number, exclusive to Interakt.
• You also need to have a Facebook page for your business and you should also be an admin of the page as you will be required to complete Facebook Business Verification.
Once you have all these details ready with you, ensure that you are logged into Facebook. Click on ‘Continue’ and you will be redirected to the following page:
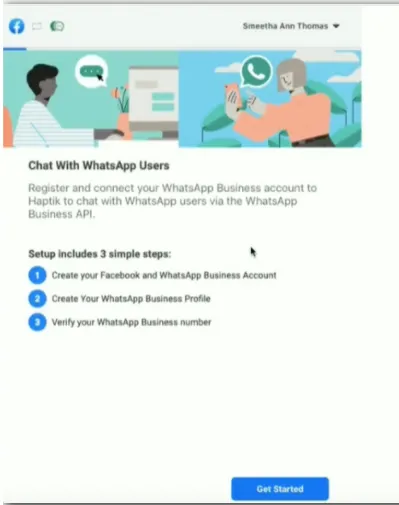
As you can see, there are just three simple steps to complete the process – click on Get Started to start linking your Facebook and WhatsApp Business account.
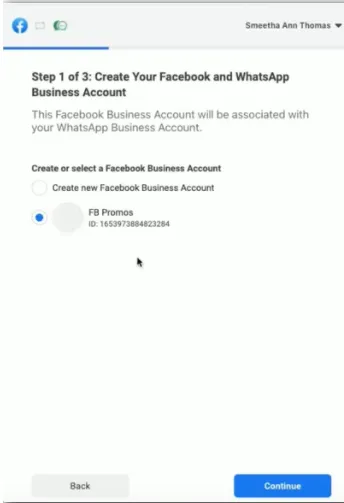
The next step is to select the Facebook Page that you would like to use for your WhatsApp Business API. Once selected, click on “Continue”.
Step 2: Create Your WhatsApp Business account
Once you have selected the Facebook Page that you would like to use for your WhatsApp Business API, you will need to create a new WhatsApp Business account name.
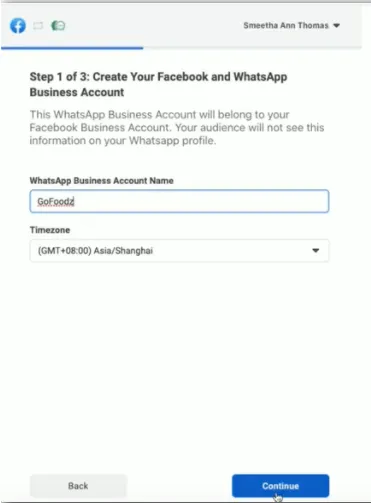
You can just type in your business name, select the correct time zone and click “Continue”. Facebook will start processing the details to set up your account.
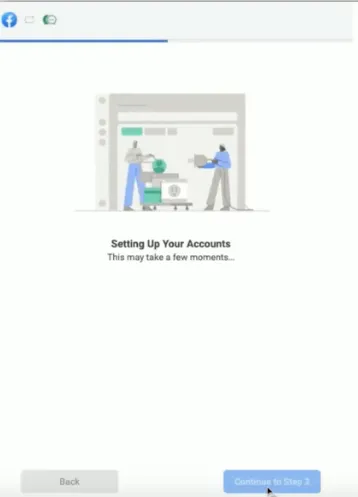
Click on “Continue to Step 2” to setup your WhatsApp Business Profile.
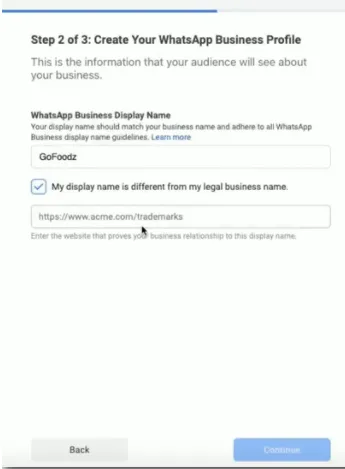
In this step, you need to set up your WhatsApp Business Profile and to do this you will need to provide the display name that you would like to use for your business on WhatsApp.
Your display name should adhere to WhatsApp Business guidelines.
If your display name happens to be different from your business name, please ensure that you provide the website to indicate that it is the same business.
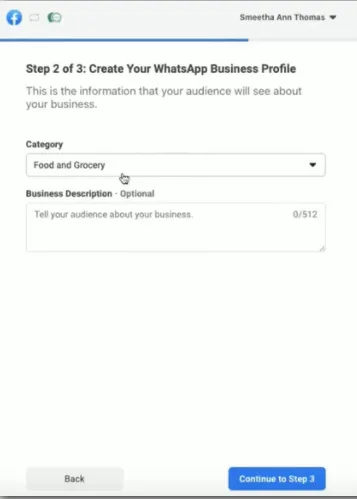
Then, you need to choose the category of your business from the dropdown. If you’d like to describe your business in detail then you can choose to give a short description in the optional field below. You can then click on Continue to move to the third and final step.
Step 3: Verify your number for WhatsApp and link to Interakt.
In the final step, you will need to provide the phone number that you would like to use for WhatsApp Business API.
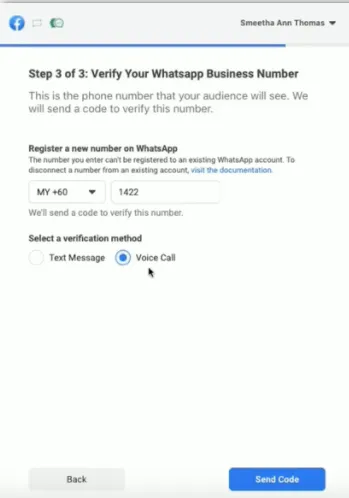
Please note that the number that you provide here should not be linked to an existing account on WhatsApp – if it is, then you can check how to disconnect it by visiting the link shown above.
Then, you need to opt for the OTP verification method which is either a text message or voice call.
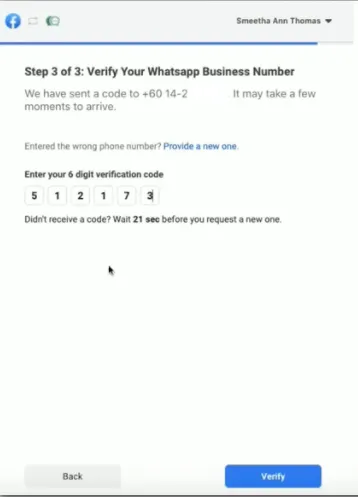
Once you receive the one-time verification code, you need to enter it here and then click on verify. Your number will be linked to WhatsApp Business API.
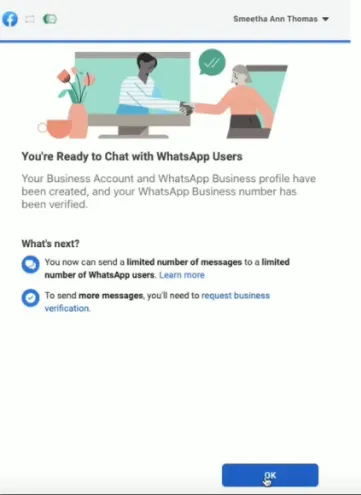
You’ve now successfully created your business account, WhatsApp Business profile and your WhatsApp Business number has been verified! You’re now all set to get started with Interakt’s 14-day free trial.
So wait no more – send a WhatsApp message to your business and see how it appears on your Interakt’s shared team inbox dashboard.
Note: Now that you have signed up, Facebook allows you to use WhatsApp messaging in a restricted manner until you complete your Facebook business verification. To be able to send more messages, go ahead and get started with your Facebook Business Verification process – you can click this link to know all about it.

