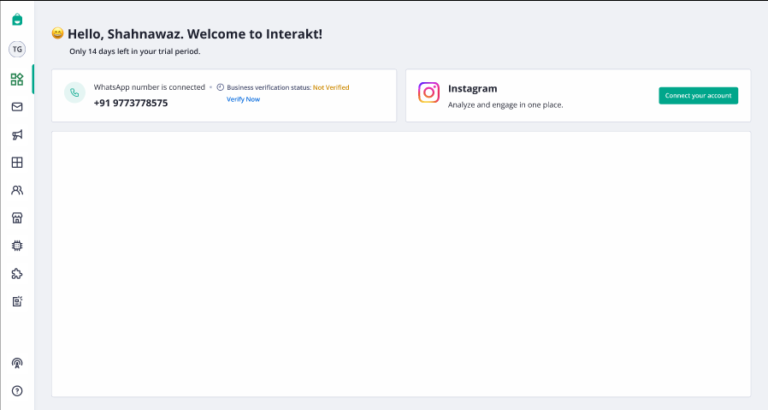
Businesses looking to communicate with customers on WhatsApp or other Meta platforms (Facebook and Instagram) must first obtain Meta business verification. Verification is crucial for businesses that want to establish a strong online presence and engage more effectively with their audience on messaging channels like WhatsApp.

Why is business verification mandated by Meta?

Meta has made verification mandatory to ensure:

• The business portfolio belongs to a legal business entity or organization.

• You are an authorized representative of the business you are trying to get verified.

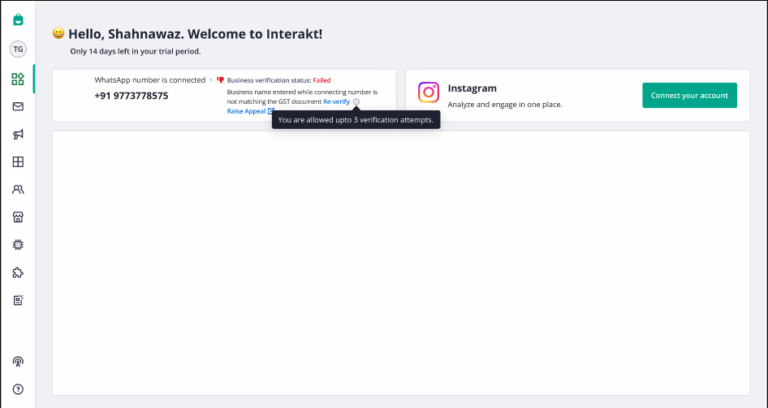
What will happen if your business is not verified by Meta?

Businesses that don’t obtain Meta verification status will:

• Be blocked from sending WhatsApp messages.

• Be unable to log in to their Facebook Business Manager account.

Benefits of getting Meta business verification via Interakt

Interakt simplifies the business verification process for merchants without website. The process can be directly completed within the Interakt user interface. Benefits of getting your business verified by Meta via Interakt include:

• Brand protection: Verification protects your brand from being impersonated, ensuring customers are interacting with the legitimate business.

• Faster onboarding: Enjoy a faster onboarding process without going through traditional business verification methods.

• Increased messaging limits: Upgrade to higher messaging limits (up to 1000 messages per day) after business verification.


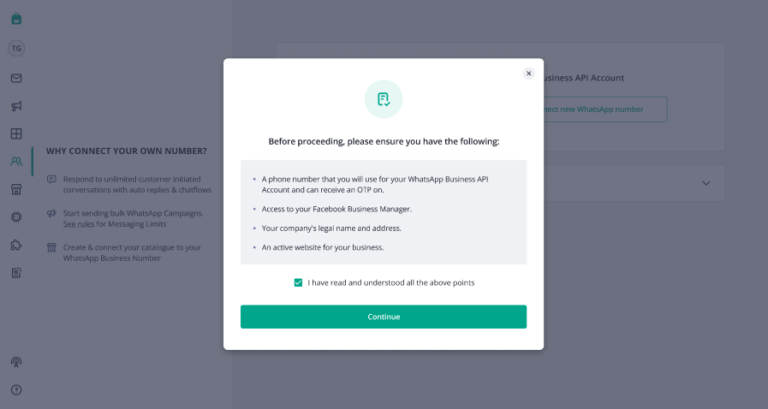
Prerequisites for Meta business verification 

Before starting the Meta business verification process, you must have:

• An active website

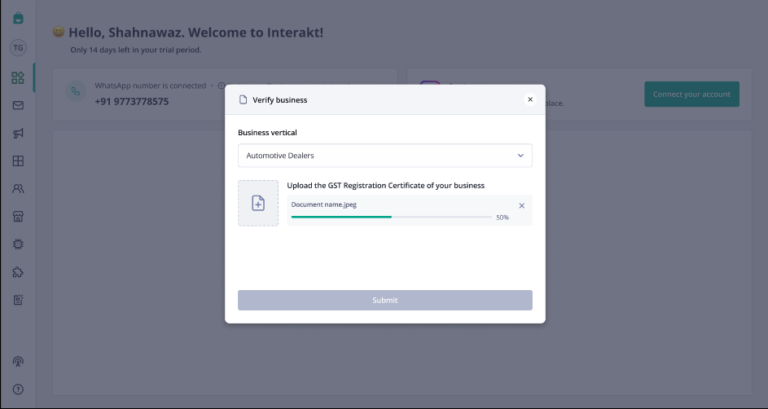
• If you don’t have an active website, please use GST certificate for verification

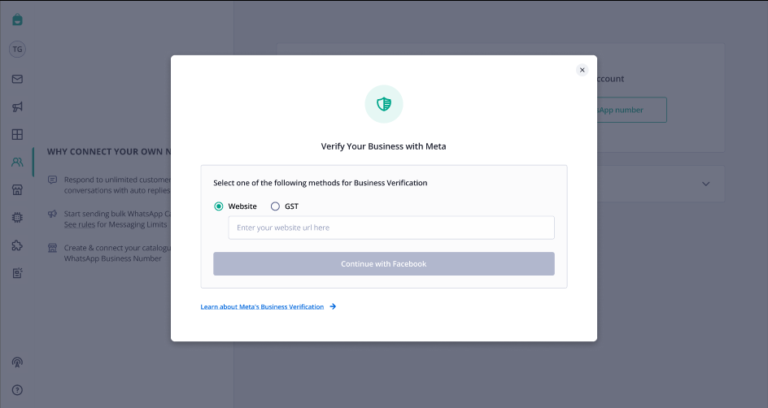
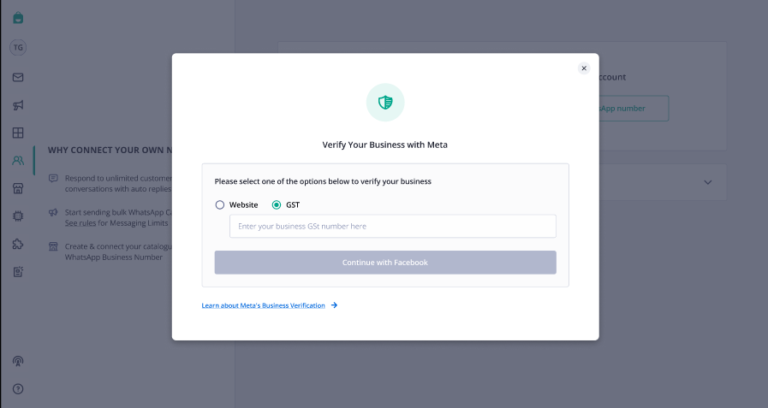
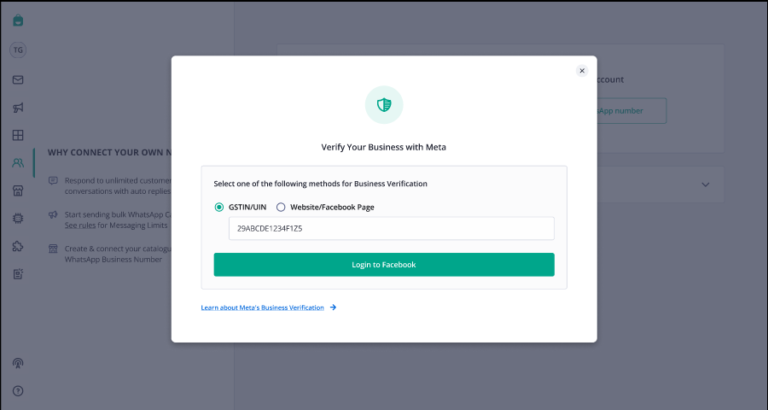
There are two ways to get Meta business verification:

1. With website

2. Without website

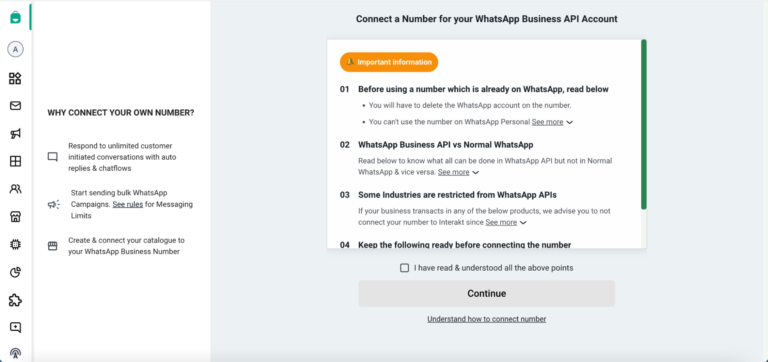
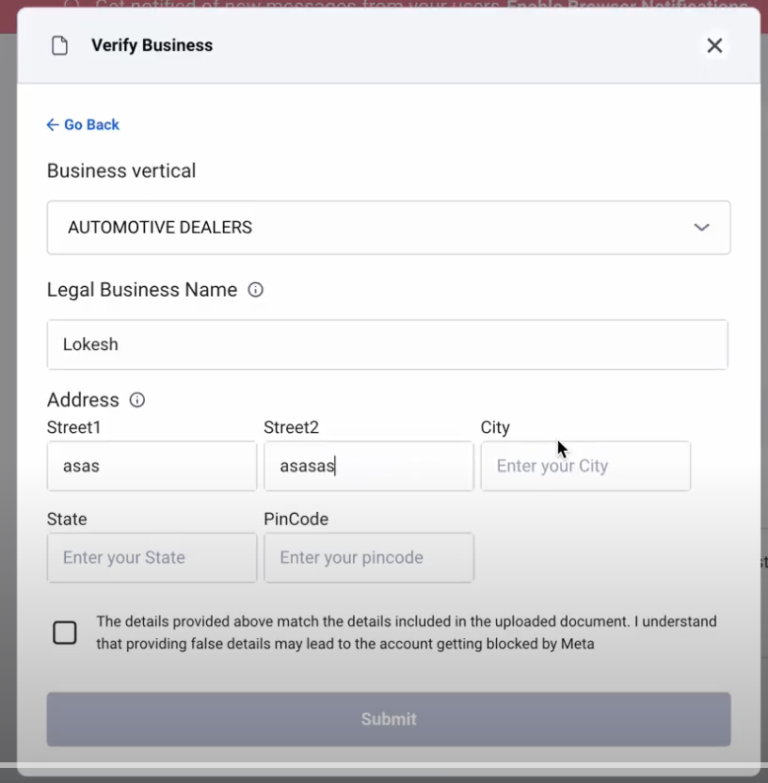
Step-by-step guide to business verification via Interakt [Without WEBSITE]

Follow this simple step-by-step process to get your business verified by Meta. 

Step 1: Log in to the Interakt app and click on “Home” or “Onboarding” in the left menu panel to start the process for Meta verification. 

image3 7

Step 2: Click on “Continue” after you’ve read the disclaimer and agreed to the T&Cs by clicking the checkbox. You’ll next get a pop-up with instructions to proceed with the Meta business verification process.

image9 5

Step 3: After you click “Continue”, you’ll see the following screen with options to Meta verify for business account via website or GST. If you have an active website that can be used for Meta business verification, select “Website” for verification and click on “Continue with Facebook” to complete verification. 

image1 7

 For businesses that don’t have an active website, GST is the method of verification. 

image4 7

Step 4: Next, select the GSTIN/UIN button in the following screen and enter the GSTIN/UIN number corresponding to your business. Click “Login to Facebook” after entering. 

image11 2

Step 5: When you click on “Login to Facebook”, you’ll be redirected to Facebook to complete the embedded signup and connect your WhatsApp number.

image12 2

After you’ve connected your WhatsApp number, you’ll see the option to verify your Meta  business account on your homepage.

image10 4

Step 6: Click on “Verify Now” to provide your business details. As shown in the screenshot, you’ll need to select the business vertical from the options.

image7 7

If you’re using your GST certificate for the verification process, ensure that the document complies with the following guidelines before you click “Submit”:

• The GST registration certificate must be in PDF, JPG, JPEG, or PNG format

• The GSTIN number should be active and mapped to the legal name on the GST certificate 

• The address on the GST certificate must match with details provided during verification for Facebook.

If the details are missing or inaccurate, then Meta will reject your business from being verified.

Step 8: After reviewing the details, click “Submit”. After submission, the details will be passed to Meta for approval. 

image6 7

Step 9: After submission, a decision on Meta account business verification can be made in 10 minutes or could extend to 14 business days. You’ll receive a notification when the review is complete. 


You’ll see the text “Business Verified” if your business is verified.

image10 4

What should you do if your Meta business verification fails?

Business verification can fail for various reasons:

• The business name does not match the name on the GST certificate.

• The document format or file type is different from what’s accepted by Meta

• The language on the document is unsupported

• The document is either not viewable, or expired, or doesn’t contain the legal business name

• The business address or phone number mentioned on the document doesn’t match the details provided

If Meta rejects your business verification, you’ll see “Failed” next to business verification status. The reason for rejection is also mentioned. 

image5 7

If rejected, businesses can apply for re-verification by clicking “Re-verify”.

image8 6

Note: Businesses are allowed three verification attempts. If a business hasn’t been verified after three attempts, it must raise an appeal to Meta and complete the verification. Learn more about raising an appeal.