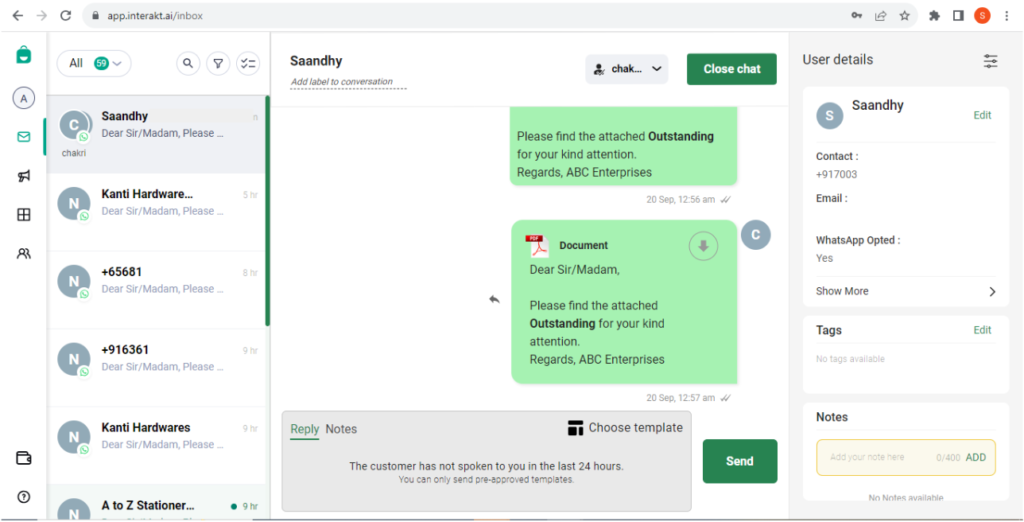
With Tally X Interakt’s WhatsApp API solution, your business gets access to a Shared Team Inbox, connected to a single WhatsApp Business API Number, where your teammates can collaborate to manage customer chats. In the Shared team inbox, you can:
1. Check the status of all the messages that you have sent from TallyPrime
2. Reply to your customers
3. Assign chats to your team members
4. Add labels to chats and filter chats on basis of those labels
5. Add tags & notes on customers
All messages sent from TallyPrime will appear in the Shared Team Inbox.
As shown below, a double tick will appear if the message has been delivered and not yet read by the end customer (or, if the read receipts are turned off). If the message has been read (and the read receipts aren’t turned off), then a blue double tick will appear.
If the customer has messaged in the last 24 hours:
As soon as a customer replies to you (from their WhatsApp app), the reply will appear in the Shared Team Inbox like below. You can then type a free form reply to them and send it, as shown below:


For your customer, the above conversation will look like the following in their WhatsApp app:

If the customer has not messaged in the last 24 hours:
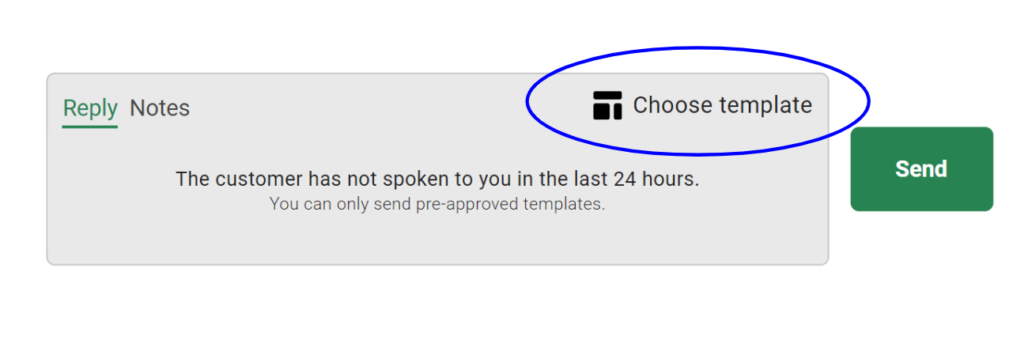
You can only send them a pre approved WhatsApp template. To send a WhatsApp template message from the inbox, click on ‘Choose template’ in the Composer Area, and select a template from the list of approved templates.

If the selected template has a variable, like {{1}}, you will need to specify the value of that variable, as shown below. You can choose to map {{1}} to a pre-saved contact field like Phone Number / Name / Email etc, or you could simply select ‘Use Constant Value’ and type out the value for {{1}} in the text box to the right.

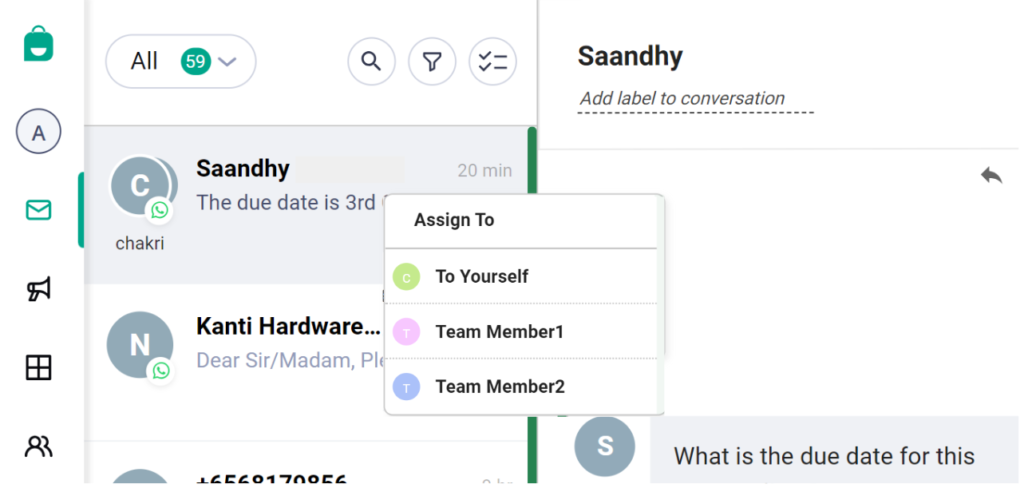
Assign chats to your team members
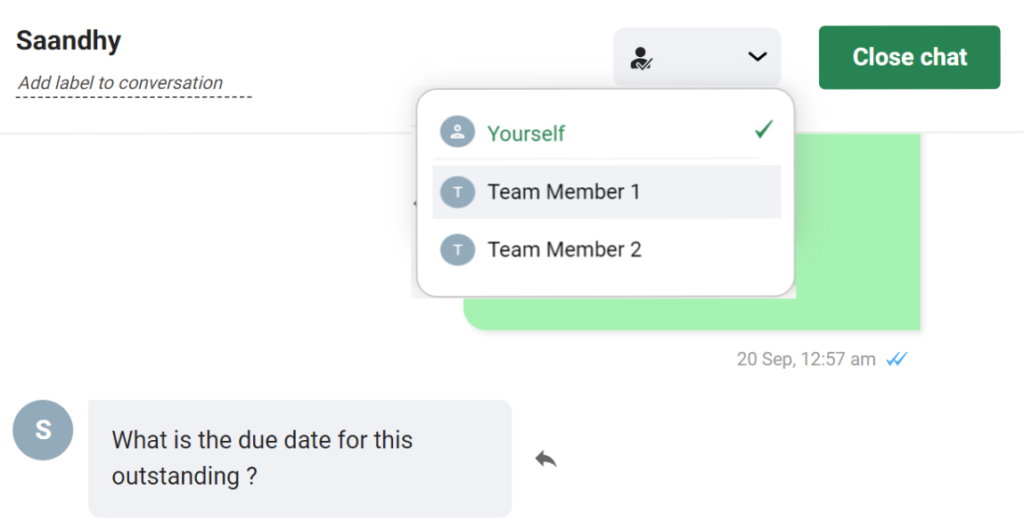
Alternatively, you can also left-click on the chat in the left panel, where the list of all chats are shown, and then, select the team member to whom you want to assign this chat to.
Add labels to chats and filter chats on basis of those labels
To add labels on a chat, simply click on ‘Add label to your conversation’ below the name of your customer, and then type the label that you want to add.

To filter chats by a particular label, click on the filter icon as shown below and select the label from the dropdown.

Add tags & notes on customers
While talking to customers in the Shared Team Inbox, you might want to add some details about the customers, which other team-members can refer to. There are 2 kinds of details that can be added:
1. Tags – Tags are simple words, or, terms, that you can use to identify a customer. For example: you could apply the tag ‘frequent buyer’ or ‘loyal’ on a customer who purchases from your business regularly.
The advantage of applying tags on customers is that, later, you might want to send out a bulk WhatsApp campaign to a particular segment of your customers – for example, to all those customers who purchase frequently from your business. To filter out this segment of customers, you can use the ‘frequent buyers’ tag.
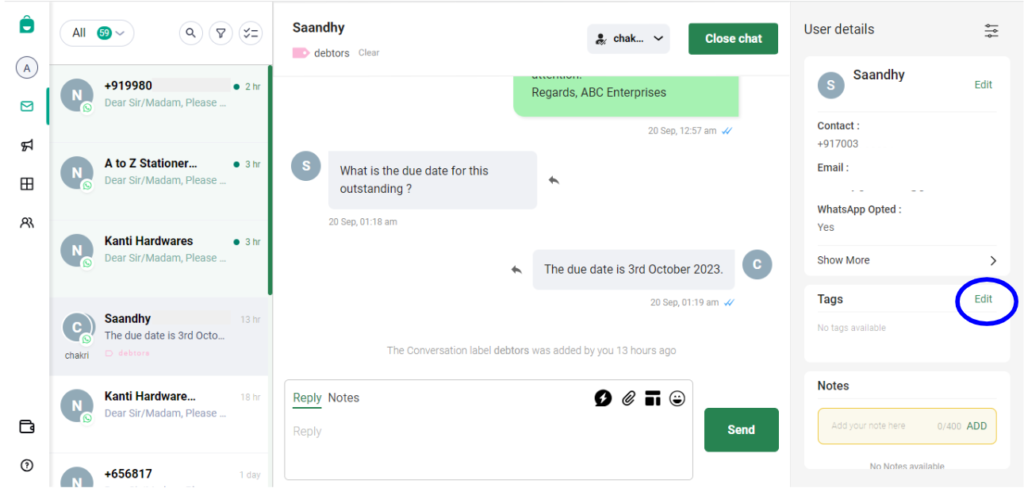
To apply a tag from the Inbox,
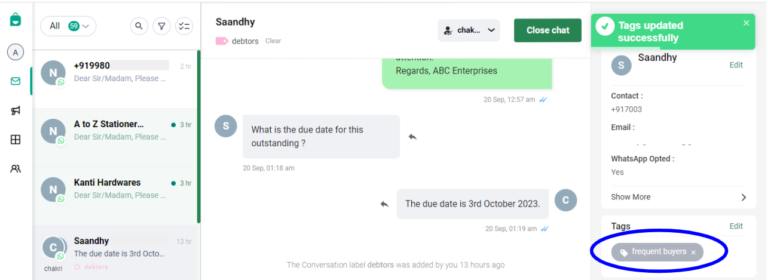
– Click on Edit (shown in the blue circle below)
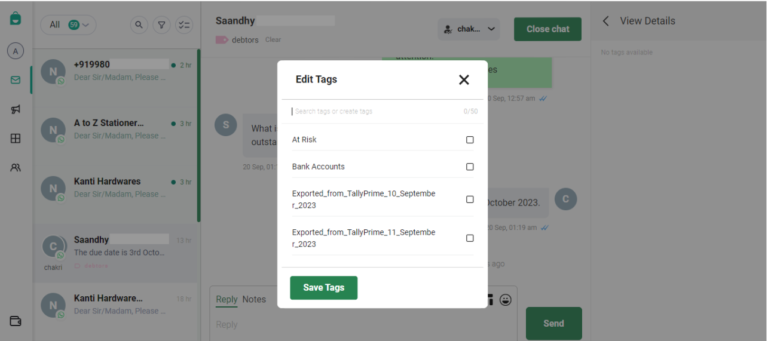
– Next, in the popup that opens, type down the tag that you want to create. And then, click on ‘Click here to create new Tag’. After doing this, you will see a green banner on the top right saying ‘Tags Added Successfully’. This means that the tag has been created and added in the list of available tags. You will still need to select the tag and save it for this particular customer.
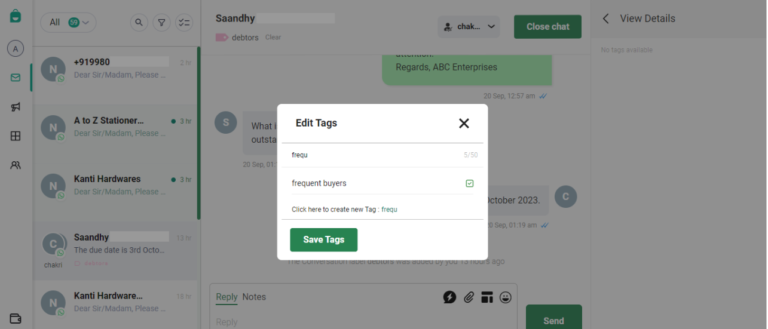
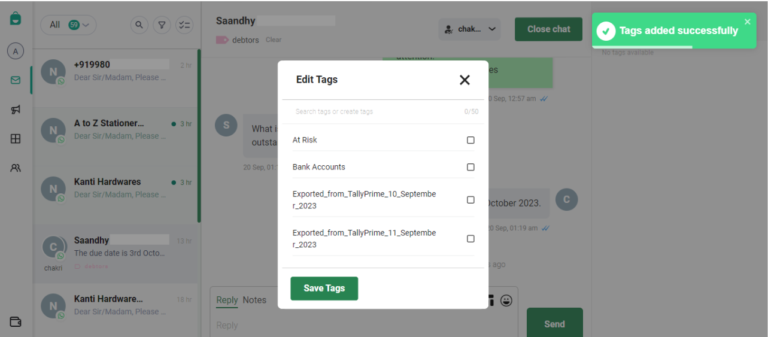
– Next, search for ‘frequent buyers’ in the list, select it and click on Save Tags. Upon doing this, the tag would be saved for the customer.

2. Notes – Notes are detailed write ups on a particular customer. You can use notes for sharing detailed context regarding a customer, with your team members.
Notes can be added from the Inbox in 2 ways:
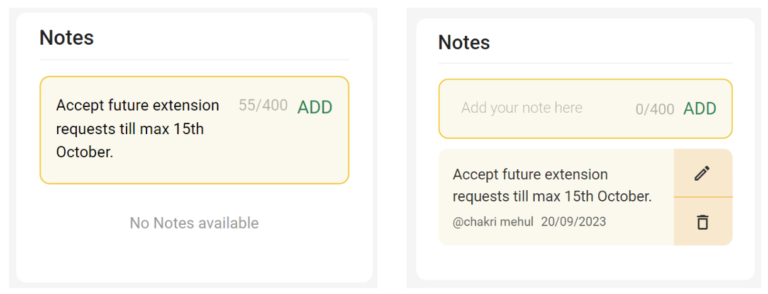
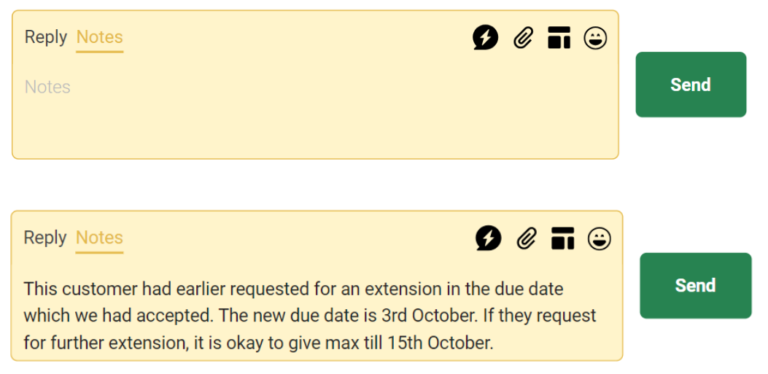
a. From the composer area: Simply click on Notes, and type down the note in the yellow composer area. Then click on Send. A note added like this will only appear in the Chat window (although the note is shown in the Chat Window, it won’t be sent to the customer – it will only be visible to your team-members in the Shared Team Inbox)
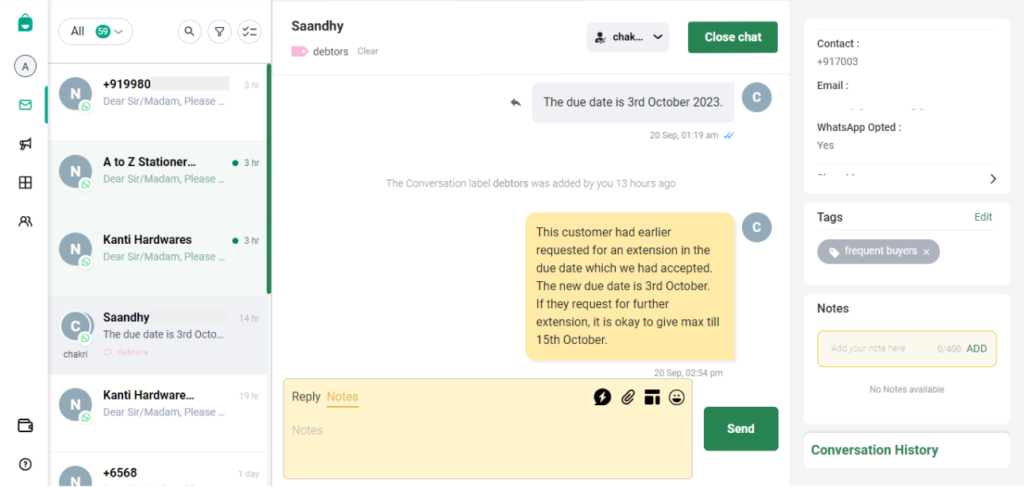
b. From the ‘Notes’ smart card on the right: Simply click on the yellow text box to start typing the note. Then click on Add. A note added in this way will only be found in the ‘Notes’ smart card, and will not appear in the chat window.
